
Introduction
Crowdfunding is a fundraising strategy that allows individuals or sets of individuals to acquire the necessary funding they need for their projects or ideas. Celo is a fully open-source blockchain that allows developers to build smart contracts and DAPPS (decentralized applications). In this tutorial, we will learn how to build a Crowdfunding application with Python on Celo. We will create a smart contract and deploy it on Celo Alfajores with the Python Web3.py library.
Prerequisites
To understand this tutorail, you must be familiar with:
- Building Smart contracts
- The Python programming language
Requirements
You sould have the following installed on you computer to execute allt that is entailed in this tutorial:
- Python 3.7 or later
- Node.js
- Celo Testnet account
- Celo Wallet
- Python-dotenv (for environment variables)
- Ganache (local blockchain)
- Web3.py (for interacting with the blockchain)
Setting up the Project
On your terminal use the following command to create a new folder for your project:
mkdir celo-crowdfunding-python
cd celo-crowdfunding-python
In your new directory, create a python virtual environment and activate it with following commands:
python3 -m venv env
source env/bin/activate
To install the ganache-cli, web3.py, and python-dotenv:
npm install ganache --global
pip3 install python-dotenv web3
Creating the Smart Contract
Next, we have to build a smart contract for our crowdfunding application.
Create a file called Crowdfunding.sol in a directory of your project.
Crowdfunding.sol
// SPDX-License-Identifier: MIT
pragma solidity ^0.6.0;
contract Crowdfunding {
    address public owner;
    uint256 public totalContributions;
    uint256 public goal;
    bool public completed;
    mapping(address => uint256) public contributions;
    event Contribute(address indexed contributor, uint256 amount);
    constructor(uint256 _goal) public {
        owner = msg.sender;
        goal = _goal;
    }
    function contribute() public payable {
        require(!completed, "Crowdfunding has been completed.");
        require(msg.value > 0, "Contribution amount must be greater than 0.");
        contributions[msg.sender] += msg.value;
        totalContributions += msg.value;
        emit Contribute(msg.sender, msg.value);
        if (totalContributions >= goal) {
            completed = true;
        }
    }
    function withdraw() public {
        require(completed, "Crowdfunding has not been completed.");
        require(msg.sender == owner, "Only the owner can withdraw the funds.");
        payable(msg.sender).transfer(totalContributions);
    }
}
The smart contract above enables contributors to contribute to a crowdfunding campaign. The contract is completed once the total contributions reach the specified value by the owner of the campaign.
- A
_goalargument is specified in the constructor function which is used to set the amount needed to be reached by the campaign. - he
contributefunction is marked aspayable(allows the function to accept payments from contributors) which adds the contributed amount to thetotalContributionsand ends the campaign once the goal has been reached. - The
withdrawfunction makes sure that the owner of the campaign is the only one allowed to access the total contributions.
Deploying the Smart Contract
After we’ve created the smart contract, the next step is to compile and deploy the smart contract.
Run the following commaand to intall py-solx which is a python wrapper around the solc solidity compiler:
pip install py-solc
Create a new file called deploy.py and paste the following code:
deploy.py
import json
from solcx import compile_standard, install_solc
from web3 import Web3
import os
from dotenv import load_dotenv
load_dotenv()
with open("./Crowdfunding.sol", "r") as file:
    crowdfunding_file = file.read()
    # print(crowdfunding_file)
# Install Solidity compiler.
_solc_version = "0.6.0"
install_solc(_solc_version)
# Compile Crowdfunding smart contract with solcx.
compiled_sol = compile_standard(
    {
        "language": "Solidity",
        "sources": {"Crowdfunding.sol": {"content": crowdfunding_file}},
        "settings": {
            "outputSelection": {
                "*": {"*": ["abi", "metadata", "evm.bytecode", "evm.sourceMap"]}
            }
        },
    },
    solc_version=_solc_version,
)
# print(compiled_sol)
# Write compiled smart contract as JSON.
with open("compiled_sol.json", "w") as file:
    json.dump(compiled_sol, file)
# Get byte code
bytecode = compiled_sol["contracts"]["Crowdfunding.sol"]["Crowdfunding"]["evm"][
    "bytecode"
]["object"]
# Get ABI from JSON contract.
abi = compiled_sol["contracts"]["Crowdfunding.sol"]["Crowdfunding"]["abi"]
Run the following command to generate a JSON file called compiled_sol.json in your root directory:
python deploy.py
This compiled JSON file would contain the ABI (Application Binary Interface) and bytes code that communicates with the EVM machine.
Connect to a Local Blockchahin with Ganache Cli
Next, we need to connect to a local blockchain to interact with our smart contract:
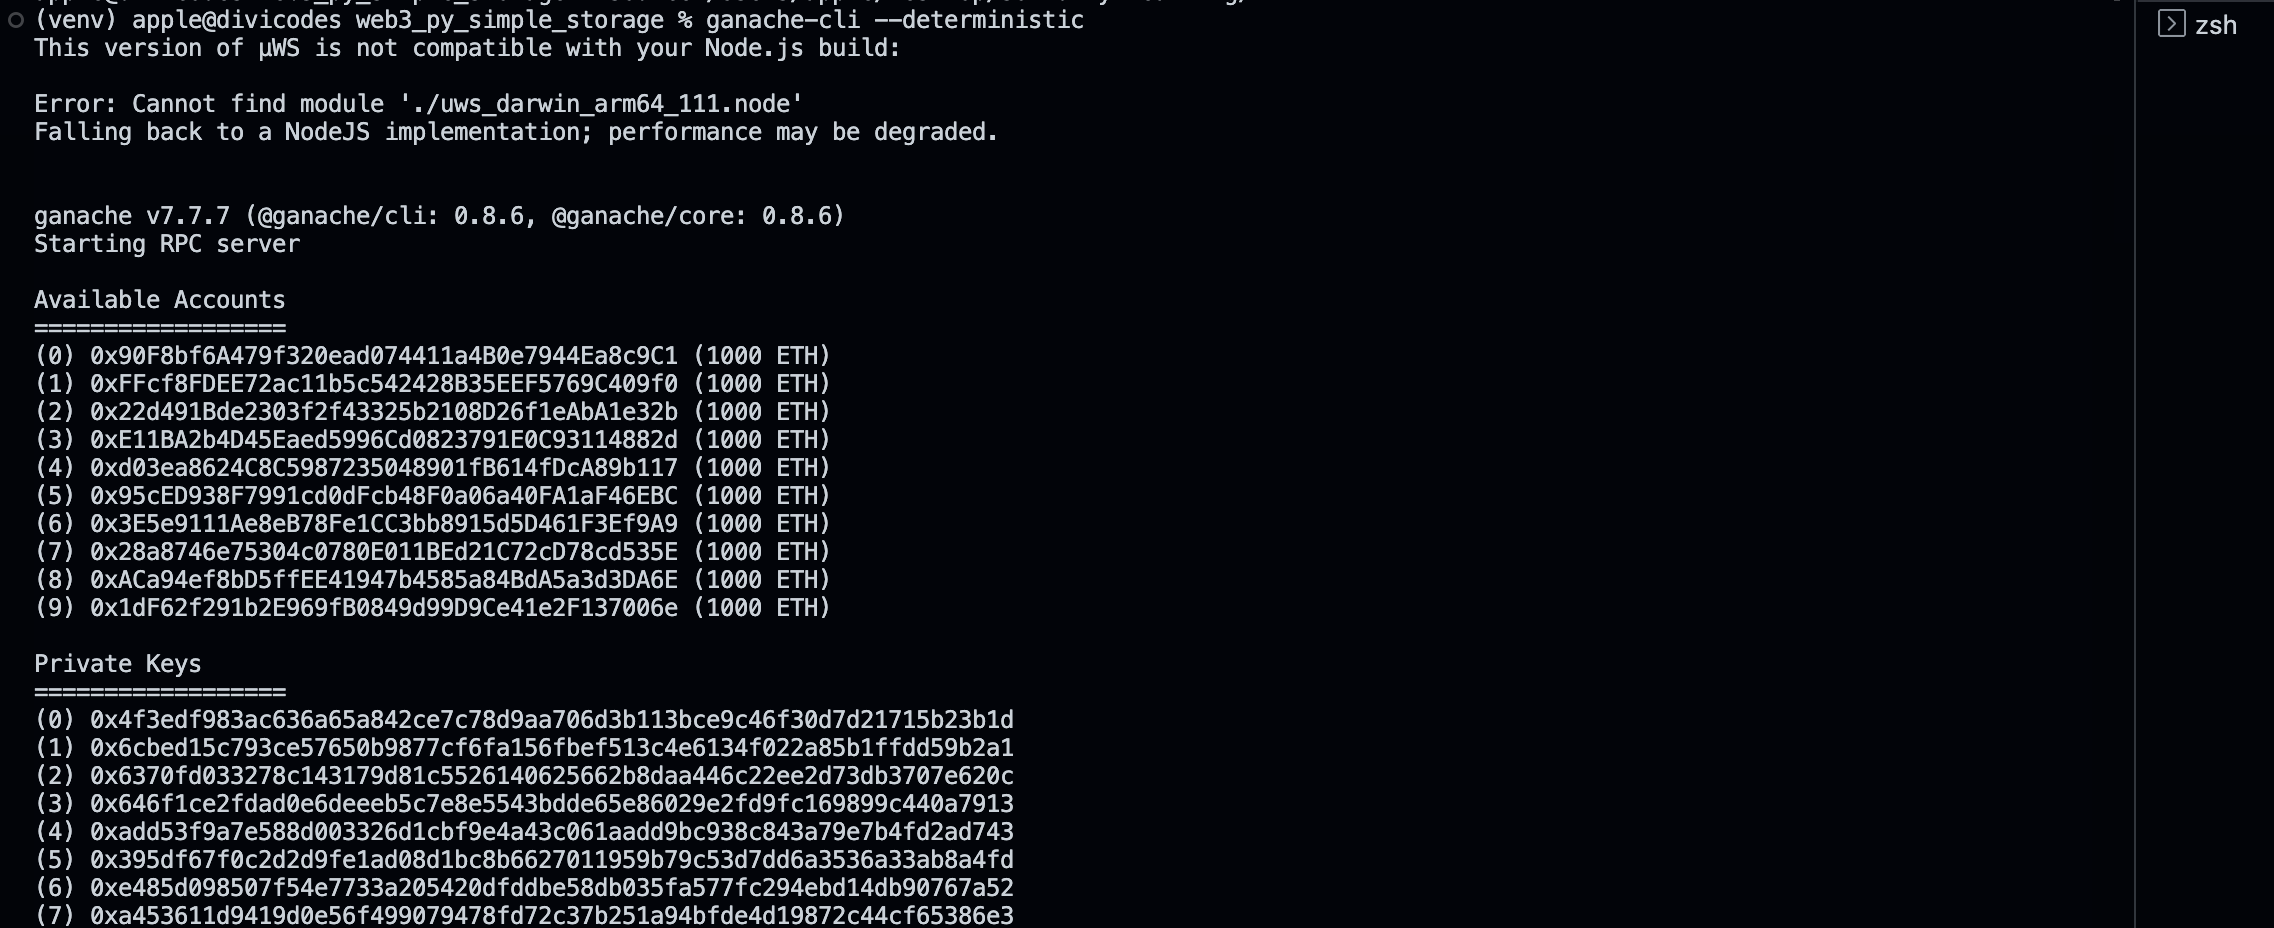
Run the following on you terminal to connect to ganache:
ganache-cli --deterministic
You should see a ilst of private keys and public addresses to use to connect to your local blockchain and an RPC URL:
Add the following code to deploy.py:
# for connecting to ganache
w3 = Web3(Web3.HTTPProvider("http://127.0.0.1:8545"))
chain_id = 1337
my_address = "0x90F8bf6A479f320ead074411a4B0e7944Ea8c9C1"
private_key = os.getenv("PRIVATE_KEY")
print(private_key)
The address and private key are gotten from any of the ones that ganache provides for us and the URL is the RPC URL that ganache is running on your PC.
For security purposes, it is best to store your private key as an environment variable.
Create a .env file and add your private key to it.
.env
PRIVATE_KEY='0x......'
Run the following command to deploy your contract on ganache:
python deploy.py
Deploying on Celo Testnet
Let us deploy our application on celo Test also know as Alfajores.
Add the following code to deploy.py
deploy.py
# Deploy to test net (Celo)

w3 = Web3(Web3.HTTPProvider("https://alfajores-forno.celo-testnet.org"))
chain_id = 44787
my_address = "0x892B6Ca9F2213f011D850F397944e77bd0b1Bca3" # celo wallet
private_key = os.getenv("PRIVATE_TESTNET_KEY") # celo wallet
# create the contract in python
Crowdfunding = w3.eth.contract(abi=abi, bytecode=bytecode)
# print(Crowdfunding)
# Get latest transaction
nonce = w3.eth.get_transaction_count(my_address)
# print(nounce)
# Build a transaction
transaction = Crowdfunding.constructor().build_transaction({ "chainId": chain_id, "from": my_address, "nonce": nonce })
# print(transaction)
# Sign a transaction
signed_tx = w3.eth.account.sign_transaction(transaction, private_key=private_key)
# print(signed_tx)
# Send a transaction
tx_hash = w3.eth.send_raw_transaction(signed_tx.rawTransaction)
tx_receipt = w3.eth.wait_for_transaction_receipt(tx_hash)
contract_address = tx_receipt['contractAddress']
print(f'Contract deployed at address: {contract_address}')
In the code above, RPC URL and chain ID are gotten from the Celo Alfajores network. The contract method on the w3.eth class takes in the ABI and bytecode to create the contract. The build_transaction builds a transaction and is passed as an argument to the sign_transaction which signs the transaction. The send_raw_transaction method finally sends the transaction and produces a receipt that contains the contract address of the deployed contract.
Conclusion
In this article, you learned how to create a crowdfunding application with Celo Python SDK. You implemented functionalities such as, creating the crowdfunding smart contract logic, and deploying it to the Celo blockchain
Next Steps
To learn more about building on Celo using Python, you can explore the following resources:
References
About the Author
Israel Okunaya is an ace writer with a flair for simplifying complexities and a knack for storytelling. He leverages over four years of experience to meet the most demanding writing needs in different niches, especially food and travel, blockchain, and marketing. He sees blockchain as a fascinating yet tricky affair. So, he is given to simplifying its complexities with text and video tutorials.