Introduction to Remix
The Remix IDE is an open-source web and desktop application for creating and deploying Smart Contracts. Originally created for Ethereum, it fosters a fast development cycle and has a rich set of plugins with intuitive GUIs. Remix is used for the entire journey of contract development and is a playground for learning and teaching Celo. In this guide, you will learn to deploy a smart contract on Celo using remix.ethereum.org.Create a Smart Contract
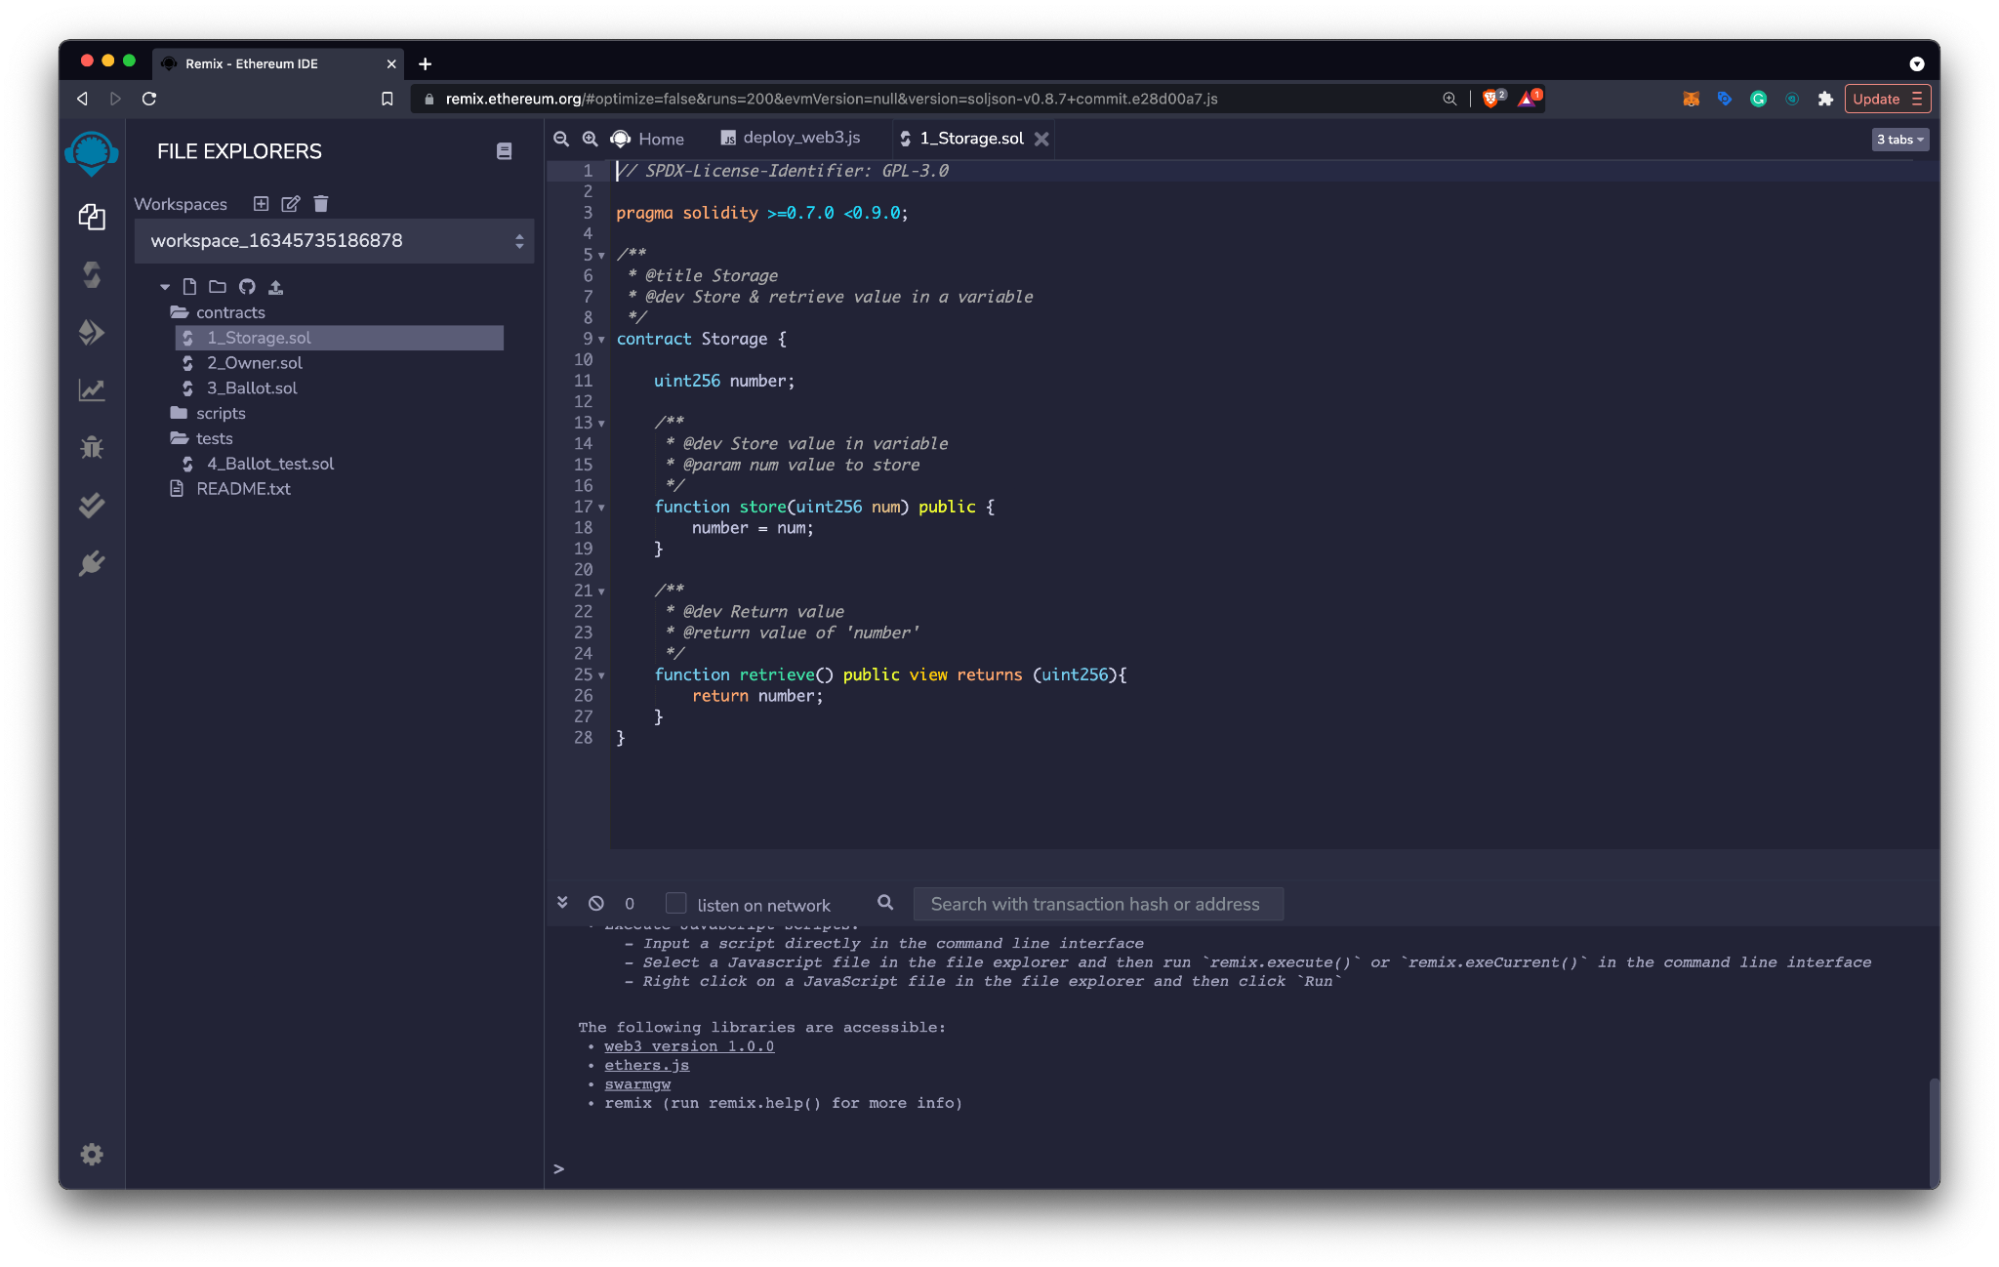
- Navigate to remix.ethereum.org and select contracts > 1_Storage.sol from the File Explorers pane.
- Review the smart contract code and learn more using the Solidity docs or with Solidity by Example.
- Complete any changes to your smart contract and save the final version (Command/Ctrl + S).
Compile the Contract
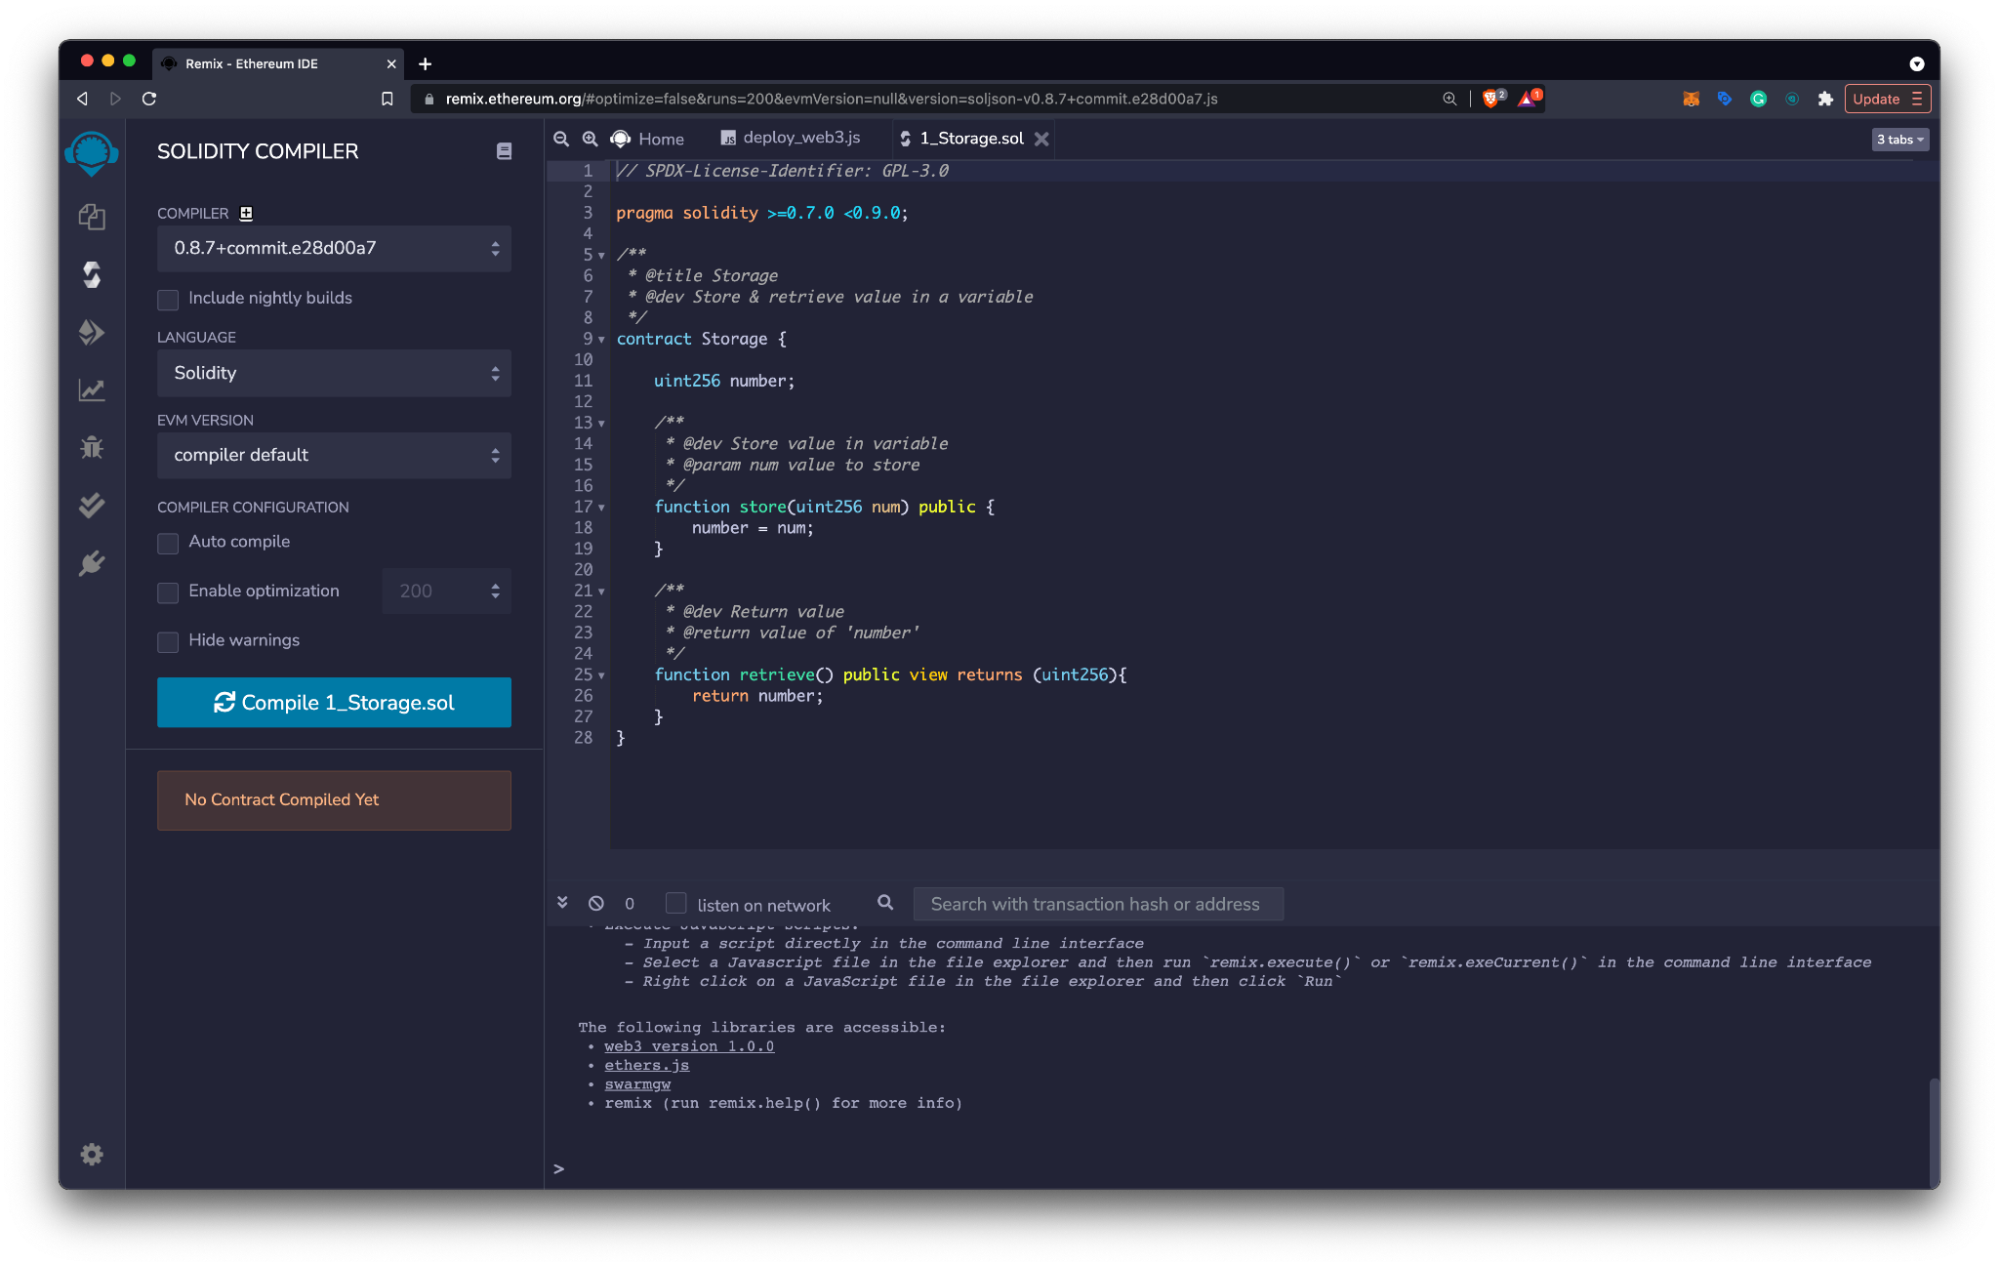
- Choose the Solidity Compiler Icon on the left side menu.
- Check that your compiler version is within the versions specified in the pragma solidity statement.
- Select the Compile button to compile your smart contract.
Deploy the Contract
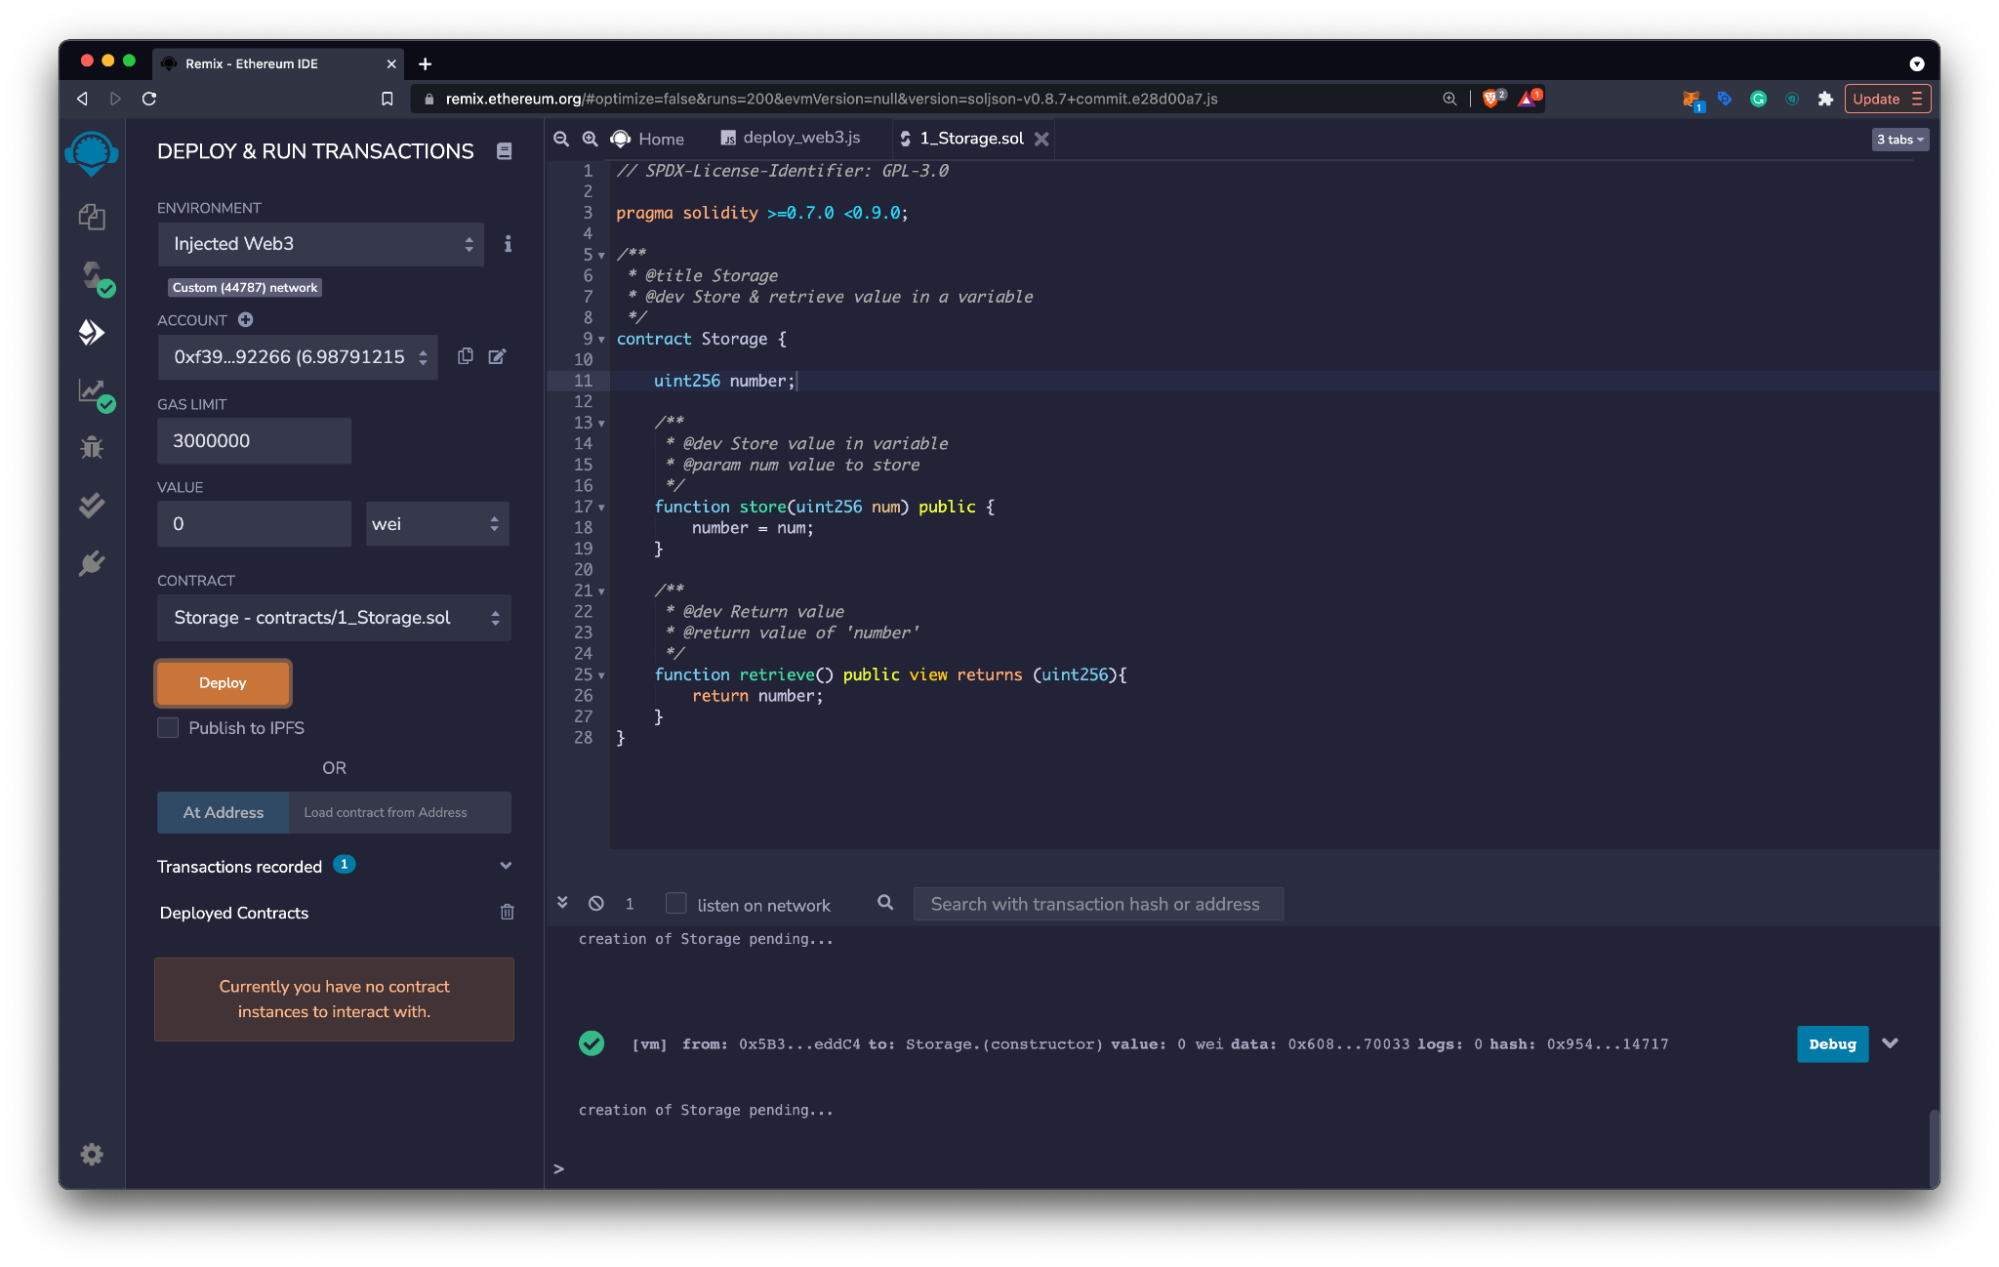
- Click the Deploy and Run Transactions Icon on the left side menu.
- Choose Injected Web3 as your environment.
- Connect MetaMask to Celo testnet and verify that the environment reads:
- Custom (11142220) network for Celo Sepolia testnet
- Custom (42220) network for Celo Mainnet
- Click Deploy and select Confirm in the MetaMask notification window to pay for the transaction
Interacting with the Contract
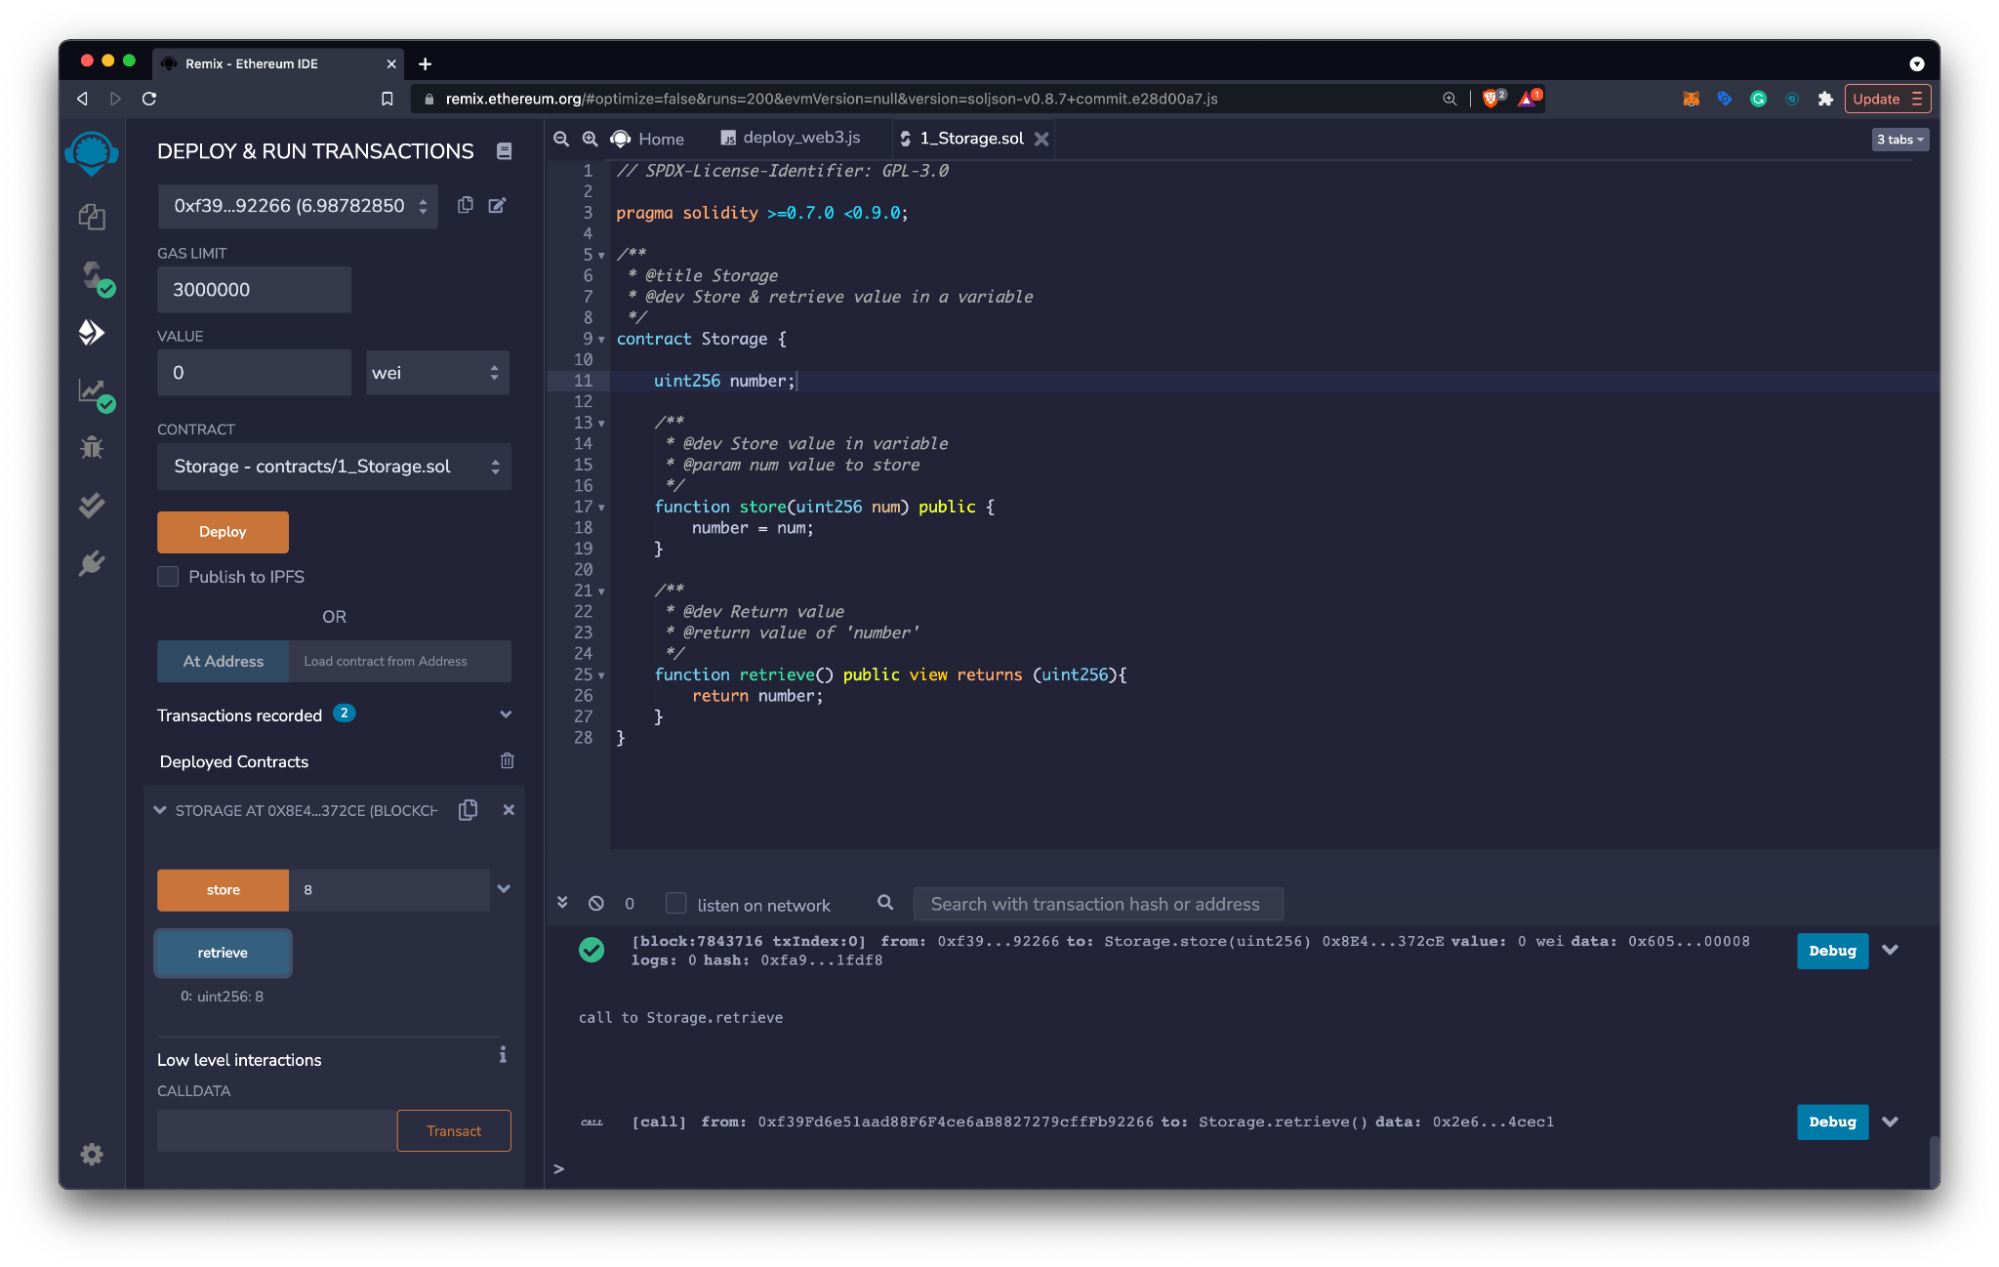
- Select the dropdown on the newly deployed contract at the bottom of the left panel.
- View the deployed contract’s functions using the Deployed Contracts window.
- Select functions to read or write on the Celo testnet using the function inputs as needed.
- Confirm write transactions in the MetaMask Notification Window to pay the transaction’s gas fee.
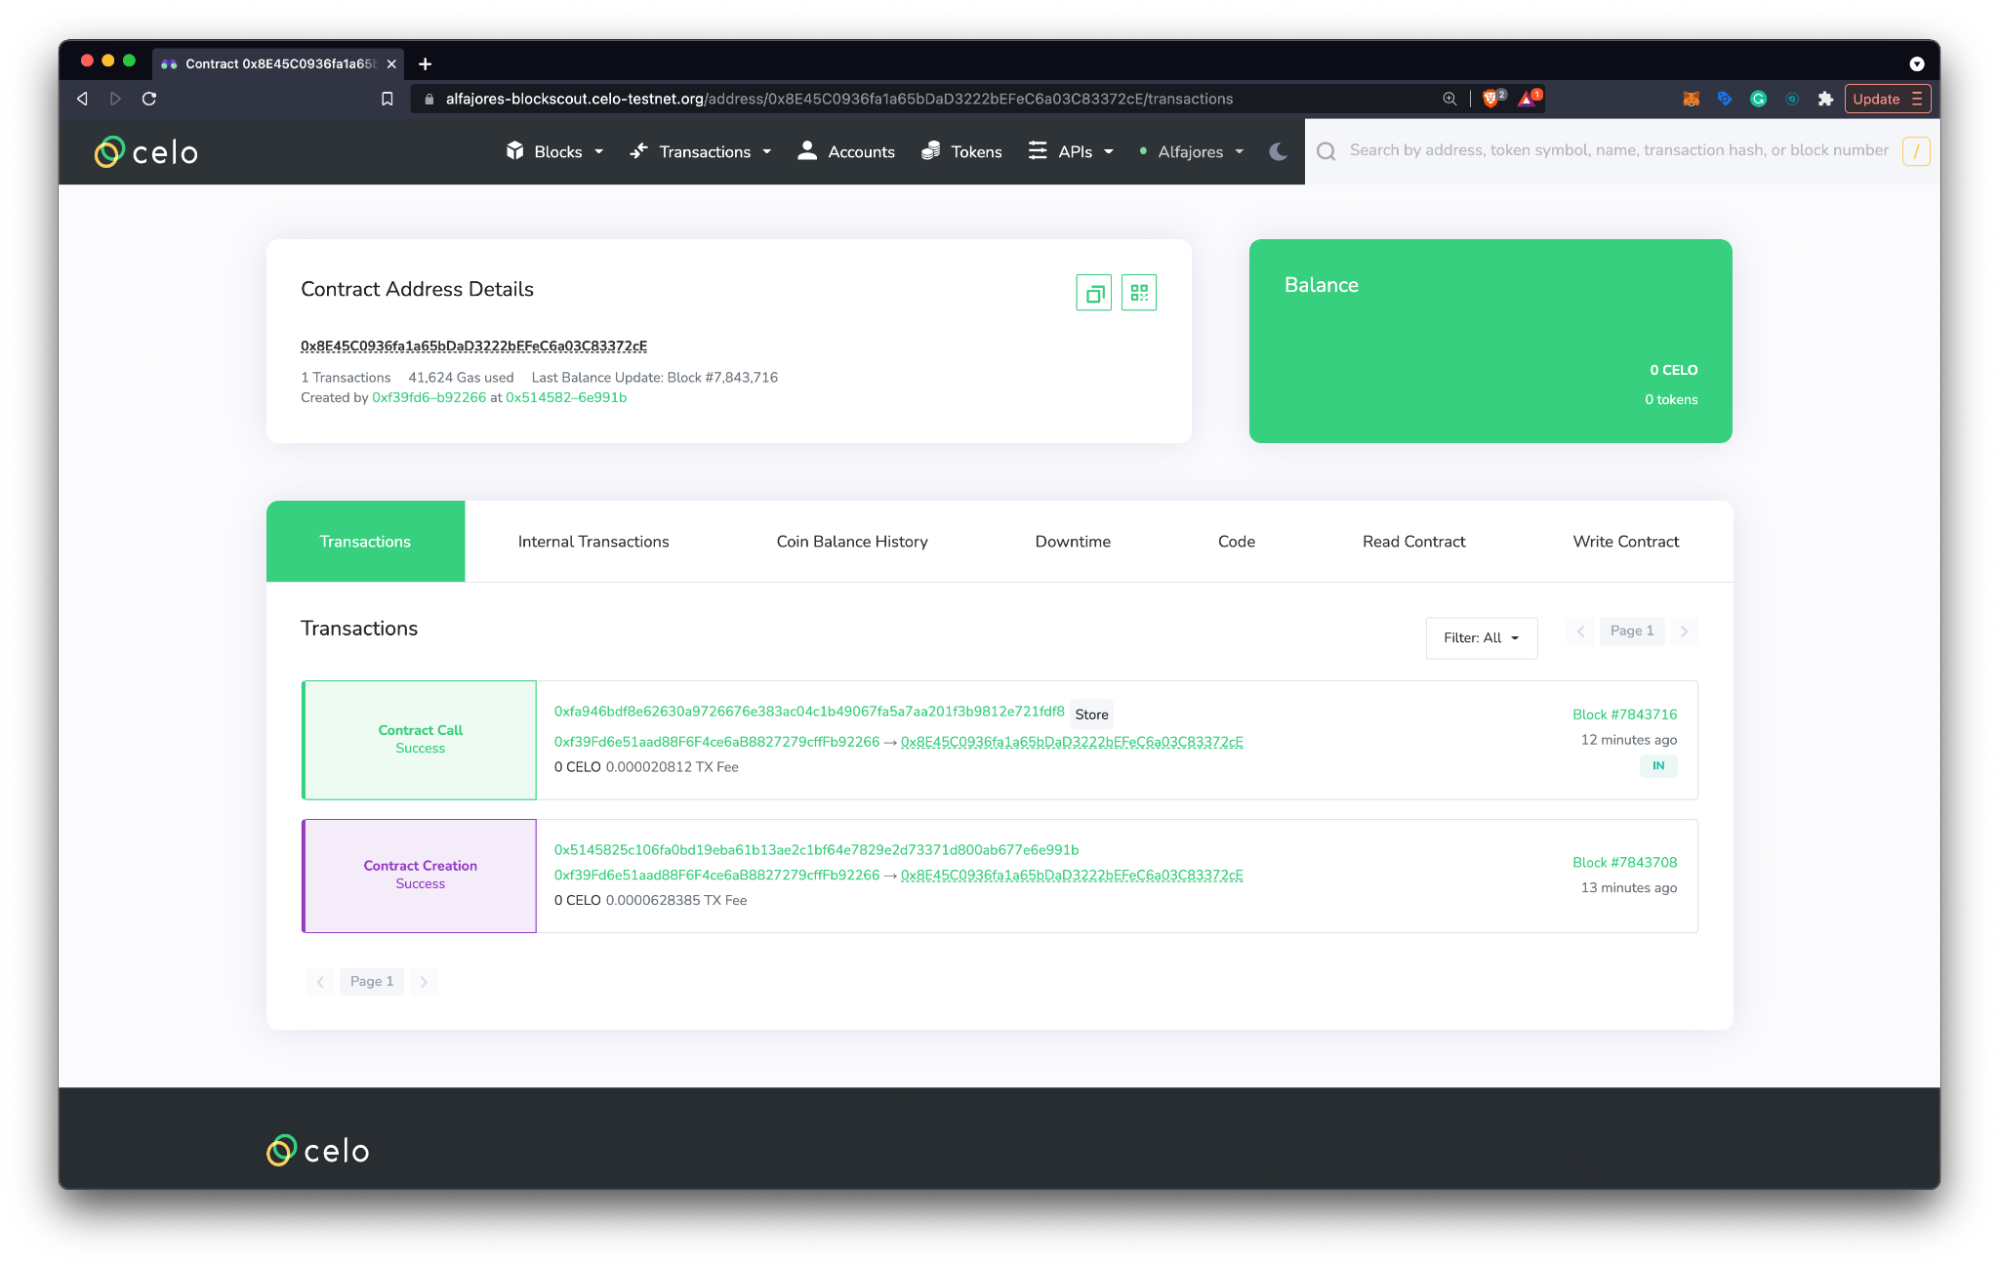
View Contract Details
- Copy the contract address from the Deployed Contracts window on the left panel.
- Navigate to the Celo Block Explorer and use the contract address to search for your contract.
- Explore the details of your deployed smart contract and learn more about the explorer here.
