

1. Installing MiniPay
MiniPay is designed for mainstream adoption, making digital payments simple and easy to use.Key Features:
- Currency Display: Balances appear in your local currency.
- Stablecoin Support: Only stablecoins (USDm, USDC, and USDT) are supported.
- Simple Swaps: The pocket swap feature allows for easy swaps between stablecoins by dragging one pocket into another.
MiniPay is only available on Celo and Celo Sepolia Testnet. Other blockchain
networks are not supported.
How to Access MiniPay:
Set Up MiniPay:
- Install the MiniPay Standalone App: Download for Android and iOS
- Create an Account: Sign up using your Google account and phone number.
2. Build Your MiniPay Mini App
For creating a new app:
- Use the Celo Composer MiniPay Template to start building.
- Follow the Quickstart Guide for a step-by-step tutorial.
For integrating an existing app:
- Follow the Helpful Tips Guide to ensure your app is MiniPay compatible.
3. Get Testnet Tokens
Request CELO testnet tokens from the Celo faucet to test your Mini App. After you got the CELO tokens, you can exchange them for stablecoins like USDm, USDT and USDC in the mento app.4. Test your Mini App inside MiniPay
Enable Developer Mode:
- Open the MiniPay app on your phone and navigate to settings.
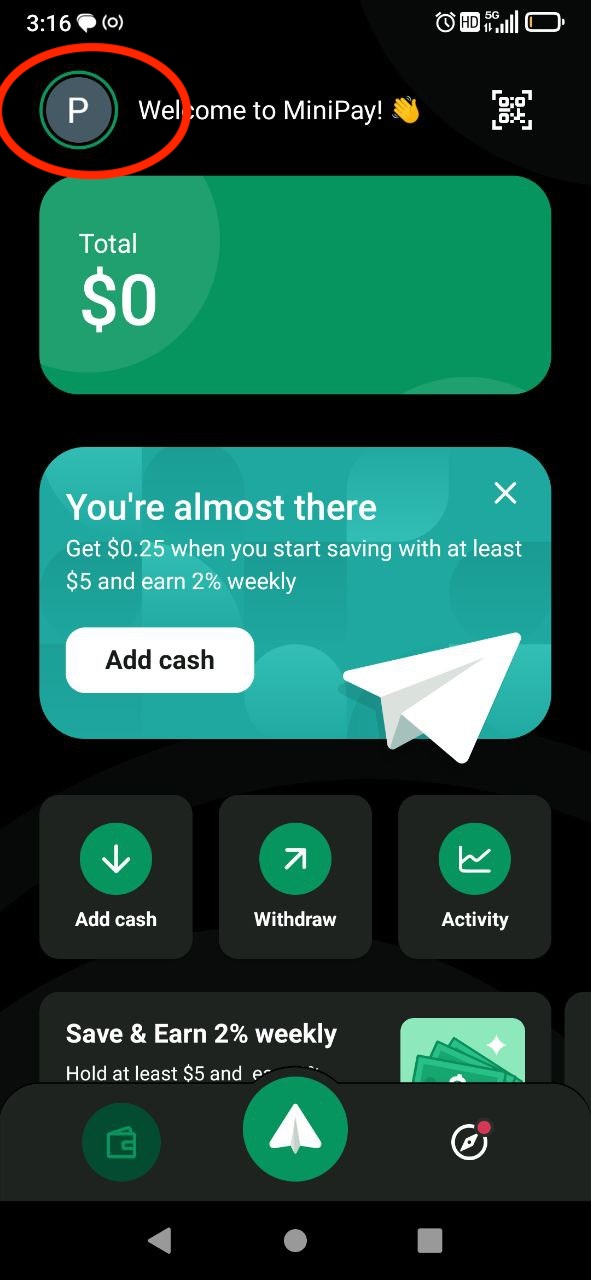
- In the About section, tap the Version number repeatedly until the confirmation message appears.
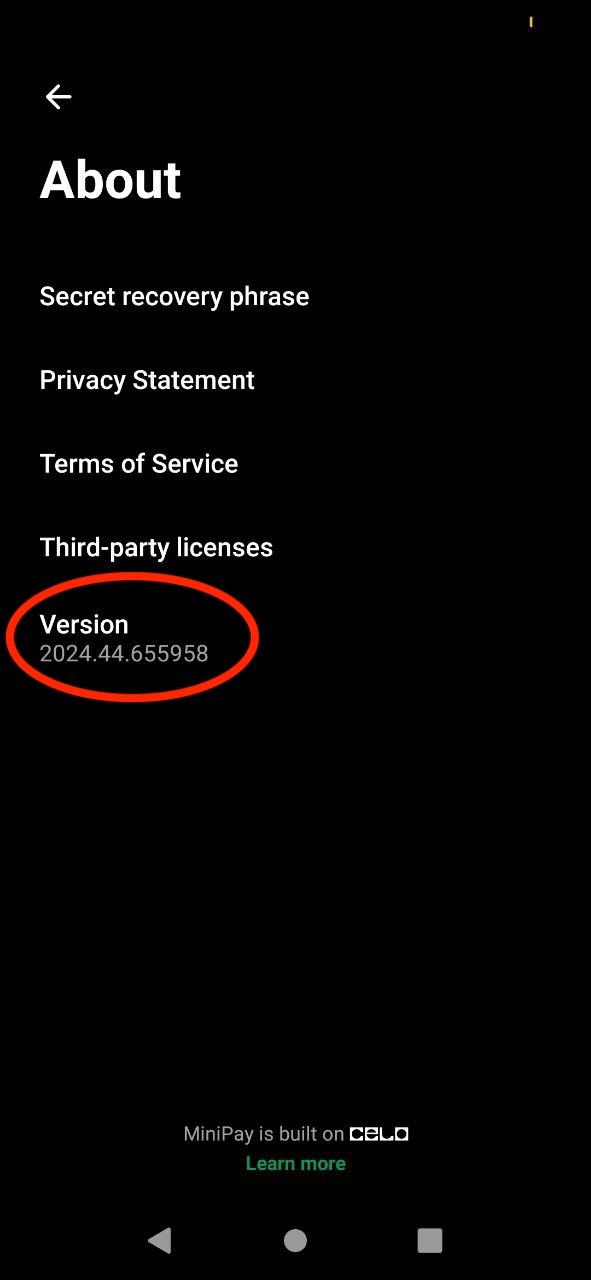
- Return to Settings, then select Developer Settings.
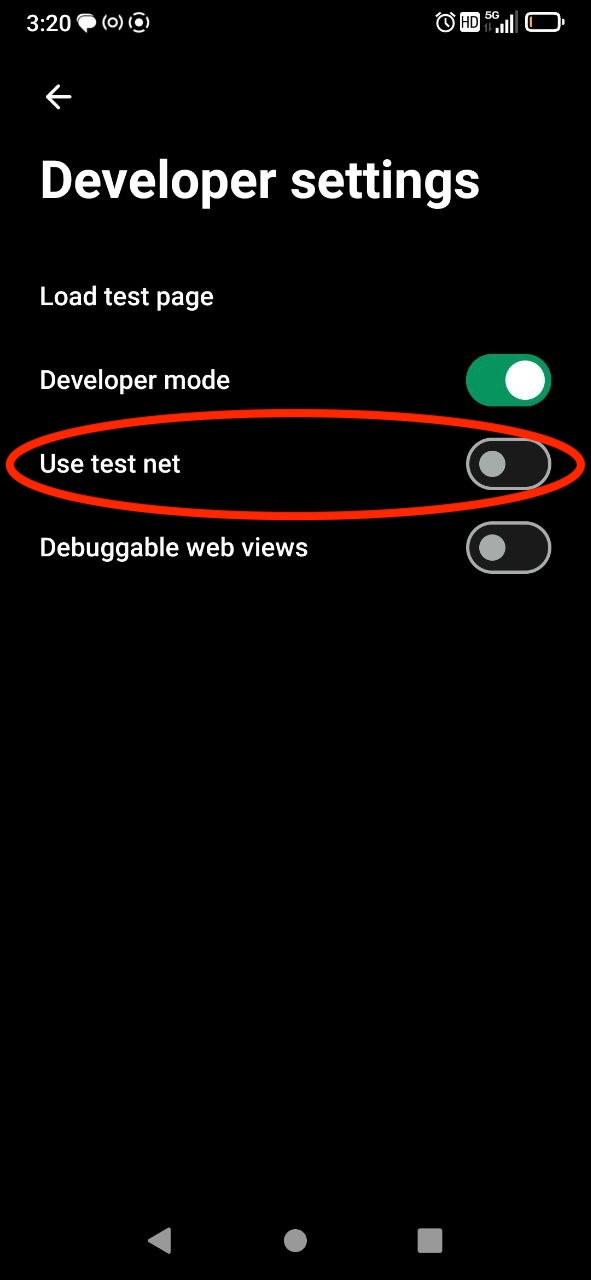
- Enable Developer Mode and toggle Use Testnet to connect to Sepolia L2 testnet.
Load Your Mini App:
- In Developer Settings, tap Load Test Page.
- Enter your Mini App URL.
- If testing a local deployment, use ngrok to expose your localhost.
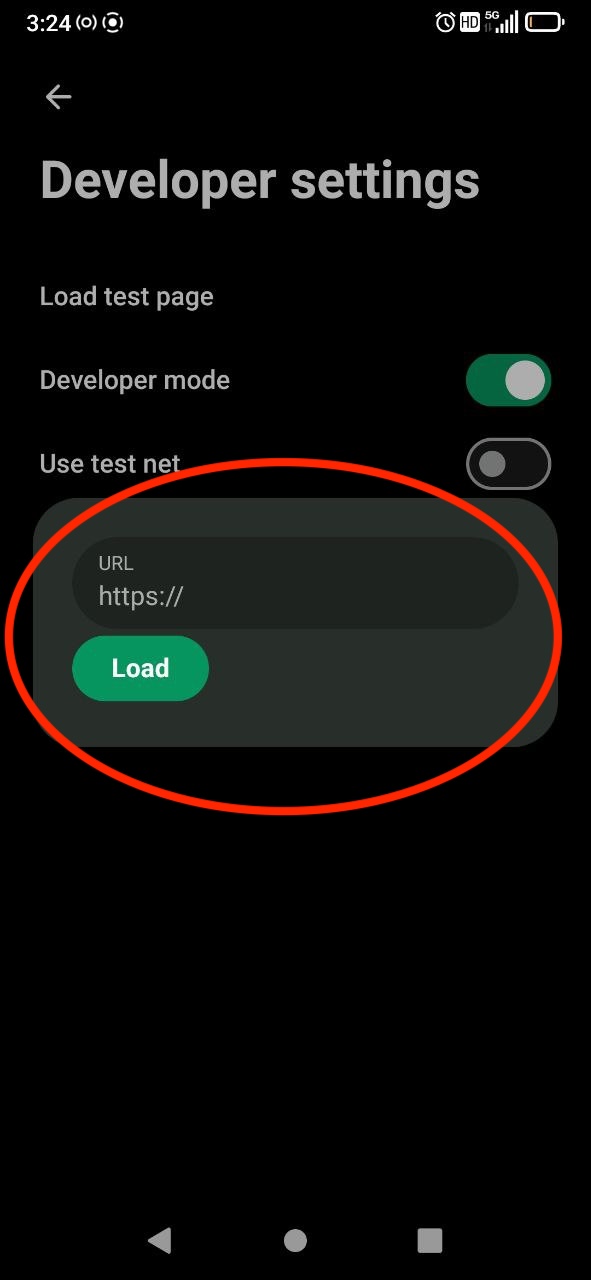
- Click Go to launch and test your Mini App.
Helpful Tips to Make Your Mini App MiniPay Compatible
1. Using Viem
2. Using Wagmi
These snippets use wagmi v2 (the current major version). In v2, connectors
are functions (e.g.
injected()) rather than the classes used in v1
(new InjectedConnector()), WagmiConfig is now WagmiProvider, and the
config is built with createConfig.WagmiProvider (wagmi v2 also requires a TanStack Query provider):
injected connector in createConfig and then uses the connect method from the useConnect hook. The useEffect ensures that the connection is established when the page loads.
In the Viem example, we’re creating a wallet client that specifies the chain and a custom transport using window.ethereum. The getAddresses method then retrieves the connected addresses.
Important Notes
Ensure the “Connect Wallet” button is hidden when your DApp is loaded inside the MiniPay app, as the wallet connection is implicit. Code Example to hide Connect Wallet button if the user is using MiniPay wallet- Always verify the existence of
window.providerbefore initializing your web3 library to ensure seamless compatibility with the MiniPay wallet. - When using
ngrok, remember that the tunneling URL is temporary. You’ll get a new URL every time you restart ngrok. - Be cautious about exposing sensitive information or functionality when using public tunneling services like ngrok. Always use them in a controlled environment.
- MiniPay manages gas fees for you. You can set the
feeCurrencyproperty when runningeth_sendTransaction, but MiniPay may ignore it and pay gas in the stablecoin the user holds the most of. Supported gas tokens includeUSDT,USDC, andUSDm(as well as other Mento stablecoins). - Use viem or wagmi to build and send transactions, as they provide native support for Celo’s fee-currency transactions.
Testing Local Development with MiniPay
If you’re developing your MiniApp locally (e.g., onlocalhost:3000), use ngrok to tunnel traffic over HTTP, for real-time testing.
Set Up ngrok
- Install ngrok: If you haven’t already, install ngrok. You can find instructions on their official website.
- Start Your Local Server: Ensure your local development server is running. For instance, if you’re using Next.js, you might run
npm run devto start your server atlocalhost:3000. - Tunnel Traffic with ngrok: In your terminal, run the following command to start an ngrok tunnel:
- Test in MiniPay: Copy the provided ngrok URL and use it inside the MiniPay app to test your DApp.